
Vevor Ice Machine User Manual: A Comprehensive Guide
Welcome! This detailed manual initiates your experience with your Vevor Ice Machine, offering guidance for optimal performance and lasting satisfaction.
Congratulations on selecting a Vevor ice machine! This appliance is designed to provide a consistent and reliable source of ice for various applications, from home use to commercial settings. We understand the importance of readily available ice, and this machine is engineered to meet those demands efficiently.
This user manual serves as your comprehensive guide to understanding, installing, operating, and maintaining your new ice machine. Before operating, please take the time to thoroughly read this manual to ensure safe and optimal performance. Familiarizing yourself with the components, safety precautions, and operating procedures will maximize the lifespan of your machine and guarantee consistent ice production.
Your journey with Vevor begins now, and we are confident that this ice machine will become an invaluable asset. We’ve designed it with user-friendliness in mind, but proper understanding is key to unlocking its full potential.
Safety Precautions & Warnings
Important Safety Instructions: To ensure your safety and prevent damage to the ice machine, please adhere to the following precautions. Always ensure the machine is properly grounded to avoid electrical shock. Never operate the machine with a damaged power cord or plug. Do not immerse the machine in water or other liquids.
Keep the ventilation areas clear of obstructions to prevent overheating. Avoid touching refrigerant tubing, as it can cause frostbite. This appliance is not intended for use by persons (including children) with reduced physical, sensory, or mental capabilities, or lack of experience and knowledge, unless supervised. Children should be supervised to ensure they do not play with the appliance.
Disconnect the power supply before cleaning or performing maintenance. Do not store flammable materials near the ice machine. Follow all local electrical and plumbing codes during installation.
Package Contents & Initial Inspection
Unboxing and Verification: Upon receiving your Vevor Ice Machine, carefully inspect the packaging for any signs of damage during transit. Do not accept delivery if the packaging appears significantly compromised. Once opened, verify that all listed components are present. The package should include the ice machine unit itself, a water inlet connector, a drainage hose, an ice scoop, and this user manual.
A parts list is typically included within the packaging; cross-reference this with the actual contents. If any components are missing or damaged, immediately contact Vevor customer support for assistance and replacement parts. Retain all original packaging materials for potential returns or warranty claims. Thorough initial inspection prevents future complications.
Checking for Damage During Shipping
Prior to Unpacking: Before signing for the delivery of your Vevor Ice Machine, meticulously examine the external packaging for any visible signs of damage – dents, punctures, crushing, or water damage. Note any discrepancies on the delivery receipt before signing. If significant damage is apparent, document it with photographs immediately.
Upon Unboxing: Carefully unpack the ice machine and inspect it thoroughly for any physical damage that may have occurred during shipping. Look for cracks, dents, or loose parts. Compare the machine’s condition to the descriptions in this manual. If damage is found, retain all packaging materials and contact Vevor customer support immediately to initiate a claim.
Identifying All Included Components
Verify Contents: Upon opening the package, ensure all listed components are present. Your Vevor Ice Machine package should include the ice machine unit itself, a water inlet connector, a drainage hose, an ice scoop, and this user manual. Depending on the model, you may also receive a water filter and additional fittings.
Component Checklist: Carefully cross-reference the physical components with the packing list provided. Inspect each item for any defects or missing parts. If anything is missing or damaged, do not attempt to operate the machine. Contact Vevor customer support immediately with your order number and a list of the missing or damaged items to arrange for replacements. Proper identification ensures a smooth setup process.
Understanding Your Ice Machine’s Components
Key Areas: Familiarizing yourself with the core components of your Vevor Ice Machine is crucial for efficient operation and maintenance. The machine primarily consists of a control panel for managing settings, a water inlet and drainage system responsible for water supply and waste removal, and an ice storage bin where the produced ice accumulates.
Sensor Functionality: An integrated ice level sensor monitors the ice storage bin’s fullness, automatically halting production when full. Understanding how these components interact will allow you to troubleshoot issues and perform routine maintenance effectively. Detailed explanations of each component’s function follow in subsequent sections, ensuring you maximize your ice machine’s potential.
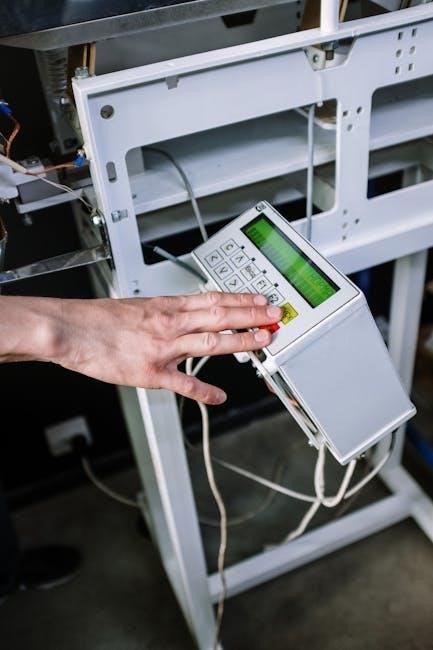
Control Panel Overview
Central Hub: The control panel serves as the central command center for your Vevor Ice Machine. It features an intuitive interface with several key buttons and indicator lights. These controls allow you to power the machine on and off, adjust ice thickness settings, and initiate the cleaning cycle.
Indicator Lights: Pay close attention to the indicator lights, as they provide valuable information about the machine’s operational status – including power, ice full, water shortage, and any error conditions. Familiarizing yourself with the function of each button and light will enable you to operate the machine efficiently and respond promptly to any alerts or issues. A detailed breakdown of each function is provided in the following sections.
Water Inlet & Drainage System
Essential Connections: The Vevor Ice Machine requires a reliable water supply for ice production and a proper drainage system to expel excess water. The water inlet connects directly to a potable water source, typically via a standard garden hose connection. Ensure the water pressure is within the specified range to guarantee optimal performance.
Drainage Importance: The drainage system is equally crucial, preventing water buildup and maintaining hygiene. A drainage hose must be securely connected to a suitable drain. Proper installation prevents water damage and ensures sanitary operation. Regularly inspect both the inlet hose and drainage hose for leaks or obstructions to maintain peak efficiency and prevent potential issues.
Ice Storage Bin & Sensor
Optimized Storage: The ice storage bin is designed to hold a substantial quantity of ice, keeping it readily available for use. Constructed from food-grade materials, it ensures ice remains clean and sanitary. Avoid overfilling the bin, as this can impede the ice-making process and potentially damage the machine.
Intelligent Monitoring: An integrated ice level sensor continuously monitors the ice volume within the bin. When the bin reaches its maximum capacity, the sensor automatically signals the machine to halt ice production, preventing overflow. Conversely, when the ice level drops, production resumes. This automated system ensures a consistent supply of ice while optimizing energy consumption and machine longevity. Regularly check the sensor for cleanliness.

Installation & Setup
Preparation is Key: Proper installation is crucial for optimal performance. Begin by carefully unpacking your Vevor ice machine and inspecting all components for any shipping damage. Ensure you have adequate space, considering ventilation requirements, and proximity to both a water source and a suitable drainage point.
Strategic Placement: Select a level, stable surface away from direct sunlight and heat sources. Avoid placing the machine near flammable materials. Before connecting any utilities, review the specified electrical requirements to ensure compatibility with your power supply. Following these guidelines will guarantee a safe and efficient setup, maximizing the lifespan and functionality of your new ice machine.
Choosing the Right Location
Optimal Environment: Selecting the ideal location significantly impacts your Vevor ice machine’s efficiency and longevity. Prioritize a well-ventilated area, ensuring ample airflow around the unit to dissipate heat effectively; Avoid direct sunlight, as prolonged exposure can strain the cooling system and reduce ice production.

Practical Considerations: The floor must be level and capable of supporting the machine’s weight, especially when filled with ice. Proximity to a grounded electrical outlet and a water supply is essential. Consider the convenience of the location for ice removal and cleaning. A location protected from extreme temperatures and humidity will contribute to consistent performance and minimize potential issues.
Water Supply Connection
Essential Steps: Proper water supply connection is crucial for consistent ice production. Your Vevor ice machine requires a potable water source with adequate pressure – typically between 60 and 90 PSI. Use the provided water inlet adapter to connect a ¼-inch water line to the machine’s designated inlet.
Leak Prevention: Ensure all connections are tight to prevent leaks. Applying Teflon tape to the threads of the water line connection is highly recommended. Regularly inspect the water line and connections for any signs of wear or leakage. Avoid using softened water, as the minerals can damage internal components. A water filter is advisable to maintain water quality and prolong the machine’s lifespan.
Drainage Hose Installation
Proper Drainage is Key: Correct installation of the drainage hose is vital to prevent water buildup and ensure efficient operation. Attach the provided drainage hose securely to the machine’s drainage outlet. Route the hose downwards, avoiding any kinks or obstructions that could impede water flow.

Drainage Options: The hose should be directed to a floor drain, sink, or dedicated drainage system. Ensure the drainage point can handle the volume of water discharged during the machine’s defrost cycle. Secure the hose with clamps to prevent accidental disconnections. Regularly inspect the hose for cracks or leaks, and replace it if necessary. Improper drainage can lead to malfunctions and water damage.
Operating Instructions: Making Your First Batch of Ice
Initial Startup: Before your first ice production, ensure the machine is properly installed and connected to both a water supply and a power source. Turn the machine on using the power button on the control panel. Allow the machine to run through an initial cleaning cycle – this may be automatic or require manual activation via the control panel.
First Ice Cycle: Once the cleaning cycle is complete, the machine will begin producing ice. The initial batches may contain impurities from the water lines; discard these first few batches for optimal ice quality. Monitor the ice production process, ensuring water is flowing correctly and ice is forming as expected. Refer to the control panel for ice thickness settings and adjust as desired.
Control Panel Functions Explained

Navigating the Interface: The Vevor ice machine’s control panel is designed for intuitive operation. Key functions include the Power On/Off button, initiating or halting all machine processes, and a Standby Mode for energy conservation when ice isn’t immediately needed. The Ice Thickness Selection allows you to choose between small, medium, and large ice cube sizes, catering to diverse preferences.
Advanced Features: A dedicated button activates the Cleaning Cycle, crucial for maintaining hygiene and optimal performance. Error indicators will illuminate on the panel if issues arise, accompanied by corresponding error codes (see Troubleshooting section). Some models may feature a 24-hour timer for scheduled ice production. Familiarize yourself with each function for seamless operation.

Power On/Off & Standby Mode
Initiating Operation: Pressing the Power button firmly activates the Vevor ice machine, initiating the cooling and ice-making processes. A visual indicator, typically an illuminated light, confirms the machine is operational. To completely shut down the unit, press and hold the Power button for several seconds until the indicator extinguishes.
Energy-Saving Standby: The Standby Mode minimizes energy consumption when immediate ice production isn’t required. Engaging Standby pauses the ice-making cycle while preserving the machine’s internal temperature, allowing for quicker resumption of operation. Simply press the Standby button; the indicator will change to signify Standby status. Remember to fully power off for extended periods of non-use.
Ice Thickness Selection
Customizing Ice Size: Your Vevor ice machine offers adjustable ice thickness settings to cater to diverse preferences and applications. Utilize the dedicated “Ice Thickness” button on the control panel to cycle through available options – typically Small, Medium, and Large. Each selection alters the duration of the freezing cycle, impacting the final ice cube dimensions.
Optimal Settings: Smaller ice cubes are ideal for rapid cooling of beverages, while larger cubes melt slower, suitable for coolers or longer-term ice storage. Experiment with different settings to determine the perfect ice size for your needs. The selected thickness is often visually indicated on the control panel display. Ensure consistent water quality for optimal ice clarity regardless of thickness.
Cleaning Cycle Activation
Maintaining Hygiene: Regularly activating the cleaning cycle is crucial for maintaining optimal performance and ensuring hygienic ice production. Locate the “Clean” or “Cleaning Cycle” button on your Vevor ice machine’s control panel. Pressing this button initiates an automated cleaning process, typically involving flushing the internal system with water and a cleaning solution (if applicable – consult your model’s specific instructions).
Cycle Duration & Procedure: The cleaning cycle duration varies by model, usually ranging from 15 to 60 minutes. During the cycle, avoid interrupting the process. After completion, thoroughly rinse the ice storage bin. It’s recommended to run a few ice-making cycles with fresh water to eliminate any residual cleaning solution before resuming normal operation. Frequent cleaning prevents scale buildup and ensures consistently clear, fresh ice.
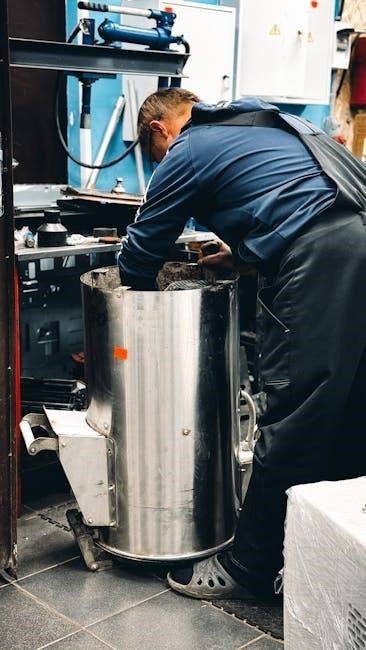
Cleaning & Maintenance
Preserving Performance: Consistent cleaning and maintenance are vital for extending the lifespan and ensuring the efficient operation of your Vevor ice machine. Regular upkeep prevents mineral buildup, inhibits bacterial growth, and guarantees consistently high-quality ice production. Daily cleaning focuses on the exterior surfaces and the ice storage bin, removing any spills or debris.
Scheduled Maintenance: Beyond daily tasks, a more thorough descaling process is necessary periodically – typically every 3-6 months, depending on water hardness. This removes scale buildup within the internal components. Refer to the “Descaling Process” section for detailed instructions. Ignoring maintenance can lead to reduced ice production, increased energy consumption, and potential damage to the machine.
Daily Cleaning Procedures
Maintaining Hygiene: Implement these simple daily procedures to keep your Vevor ice machine operating at peak cleanliness; Begin by unplugging the unit for safety. Wipe down the exterior surfaces – including the control panel and housing – with a soft, damp cloth. Avoid abrasive cleaners, as they can damage the finish.
Bin Sanitation: Empty the ice storage bin and thoroughly clean it with warm, soapy water. Rinse completely to remove any soap residue. Dry the bin with a clean towel before refilling. Regularly inspect the water inlet and drainage areas for any signs of buildup or blockage, addressing them promptly. This prevents contamination and ensures consistently fresh ice.
Descaling Process (Frequency & Method)
Preventing Mineral Buildup: Descaling is crucial for maintaining optimal performance. The frequency depends on water hardness; typically, every 3-6 months is recommended. Begin by preparing a descaling solution – follow the manufacturer’s instructions on your descaling product. Ensure the solution is specifically designed for ice machines.

The Descaling Steps: Pour the solution into the water reservoir. Run the ice machine through a complete cycle, allowing the solution to circulate. Afterward, discard the descaled ice and run 2-3 cycles with fresh, clean water to thoroughly rinse the system. This removes any remaining descaling solution, ensuring ice purity and preventing damage to internal components.
Troubleshooting Common Issues
Addressing Operational Challenges: This section provides solutions for frequently encountered problems. If the machine fails to power on, verify the power cord connection and circuit breaker. Slow or stopped ice production often indicates a water supply issue – check the water line for kinks or obstructions and ensure the water valve is fully open.
Decoding Error Signals: Pay attention to error codes displayed on the control panel. Consult the manual for specific code meanings and recommended actions. Common codes relate to water supply, sensor malfunctions, or ice storage bin issues. If problems persist, contact Vevor customer support for assistance, providing the error code for faster diagnosis.
Ice Machine Not Turning On
Initial Power Check: If your Vevor ice machine doesn’t power on, begin with the basics. First, firmly confirm the power cord is securely plugged into both the machine and a functioning electrical outlet. Next, verify the outlet itself is receiving power by testing it with another device.
Circuit Breaker & Fuse Inspection: Check your home’s circuit breaker panel to ensure the breaker controlling the outlet hasn’t tripped. If it has, reset it. Also, inspect the machine’s fuse (if applicable) for any signs of damage or burnout. A blown fuse will need replacement. If these steps don’t resolve the issue, contact Vevor support.
Ice Production is Slow or Stopped
Water Supply Verification: Reduced or halted ice production often stems from water supply issues. Ensure the water line is fully connected and the water supply valve is completely open. Check for any kinks or obstructions within the water line itself, restricting water flow to the machine.
Airflow & Condenser Coils: Proper ventilation is crucial. Confirm the condenser coils are clean and free from dust or debris, as restricted airflow hinders cooling efficiency; Also, ensure the machine isn’t positioned too close to walls or other objects that might impede air circulation. If problems persist, a professional cleaning of the coils may be necessary.

Error Codes & Their Meanings
E1: Water Supply Error – Indicates a problem with the water inlet. Verify the water line is connected, the valve is open, and there’s adequate water pressure. Check for frozen water lines in colder environments.
E2: Evaporator Sensor Failure – Suggests an issue with the evaporator temperature sensor. This may require professional diagnosis and component replacement. Do not attempt to repair this yourself.
E3: Ice Full Bin Error – The ice storage bin is detected as full. Remove some ice to reset the sensor. Ensure the ice level sensor isn’t obstructed.
E4: Compressor Overload Protection – The compressor has overheated and shut down. Allow the machine to cool for several hours before restarting. Contact support if the error persists.
Winterization & Long-Term Storage
Preparing for Cold Weather: If storing your Vevor ice machine in temperatures below freezing, complete a thorough winterization process. Begin by disconnecting the water supply and draining all water from the system, including the pump and water lines. Use a wet/dry vacuum to remove any remaining water.
Cleaning & Drying: Initiate a cleaning cycle with a descaling solution, then run a few cycles with fresh water. Thoroughly dry the ice storage bin and all internal components. Leaving moisture can lead to mold or freezing damage.
Storage Recommendations: Cover the machine with a breathable cloth to protect it from dust. Store in a dry, well-ventilated area. Periodically check for any signs of moisture or damage during extended storage.